Explain what you have discovered about this group and outline your plan to appeal to them. Conduct research to support your choice and understand what your audience is looking for in a project. Continuously gather feedback from peers at every step of the project. Use this feedback for reflection and learning.
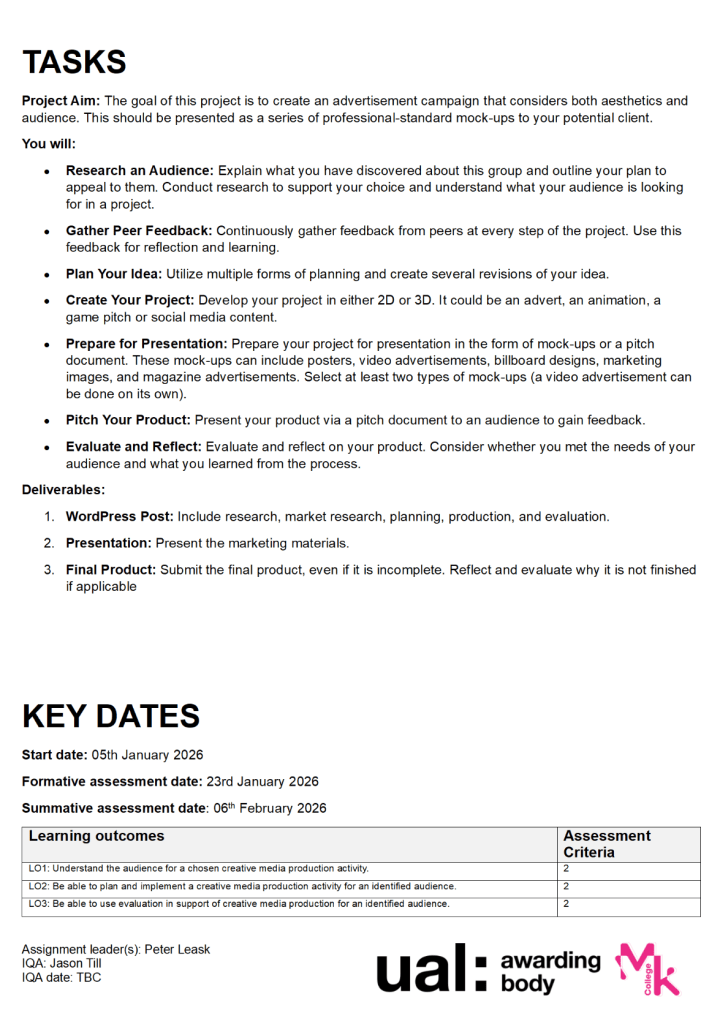
Cycling MK are a very passionate group who believe the cycling can change MK for the better. This is an environmental motivation mainly, however they also find cycling can improve peoples mental health, somewhat more then other types of exercise since you can do it in groups.
I plan to appeal to teenagers between 16- 21 and encourage them to start cycling, I think a survey would help with this, as I would be able to understand what is stopping them from cycling in the first place. It is also because cycling MK have found that the reason people aren’t using bikes isn’t because they don’t have one, they have found there are plenty, people just aren’t using them.
What you have learned about applying for next steps and what your thoughts an opinions on different ways of communication are.(1000 word limit)
Applying to next steps has definitely been a valuable experience for me, as I’ve had to consider what I genuinely enjoy and what’s important to me and navigate that in a way that is realistic, and what I think will benefit me the most- even when I don’t know what that is. I have considered many options of what I’m going to be doing in the next few years, since I didn’t enjoy the course as much as I hoped and right now I really cant see myself in a career to do with games or digital art. This is when I’ve had to communicate the most and talk to different people in what they recommend, and taking different opportunities to see what could possibly stick long term. This process can feel quite unstable especially with e-mails and digital applications, they feel quite frustrating to rely on.
Personal statement
Why do you want to study this course or subject?
I want to study dental technology because it combines precision and creativity in a really unique way that I find extremely interesting. I am particularly drawn to the technical and artistic skill needed to succeed in a career in this field, and creating something that will have a lasting impact on peoples lives. Dental Technology appeals to me as a reliable profession with clear progression, including hands on work and attention to detail. I am motivated by the responsibility of contributing to the patients care.
How have your qualifications and studies helped you to prepare for this course or subject?
Through my Level 3 qualification in Games, Animation and VFX, I gained many valuable technical and creative skill. I especially appreciate my new found knowledge in 3D modelling and working in a digital space. I also learned that although similar to my interests, this path wasn’t for me and I couldn’t see myself there long- term. However, I value the resilience and discipline I gained from persevering and completing the full duration of the course.
What else have you done to prepare outside of education, and why are these experiences useful?
Outside of formal education, I enjoy developing my skill in painting, oil painting specifically. This has strengthened my patience and attention to detail. Portraiture is my chosen focus, as I enjoy the knowledge of anatomy being a vital part of creating a harmonious, thoughtful piece. Being interested in fine art has made me more sensitized to subtle textures, colour matching and values, all of which I will be able to transfer in a career in dental technology where aesthetic accuracy is essential.
ai ethics of- , whether its a tool or replacement for artists, value of hand drawn art in the industry, therapeutic effects of art, whether art needs purpose, ethics of critiquing art
A portfolio is a collection of your best work or piece you think represent your style and progress the most, it is helpful to have a range of styles and mediums if its an art portfolio or different skills if its for job applications.
Is a portfolio different depending on what part of Games, Animation or VFX I go into?
Yes, usually your portfolio will be more saturated with the skills you have developed the most, whether its 3D or 2D, or the software your most comfortable in. However its still important to show you can adapt and develop multiple skills to a decent standard
What do I need to produce in my own time to develop my portfolio further?
Experimentation is important to show multiple skills, and these pieces don’t need to be very impressive overall, its important to show the process, such as sketches or reverence to create a better understanding of your work process.
Can you provide a guide on the DO’S and DONT’S of a portfolio?
DO’s – Start with the work your most proud and interested in, so you can be recognized for the work you want to continue doing,
DONT’s – Don’t make it to word heavy, make sure to focus on showing your experience through projects you’ve done
Teamwork can make problem solving in a group a lot easier as different perspectives can find a solution more efficiently
Don’t work with friends
Roles – setting roles in a group can help assign people to jobs that they are the most comfortable and experienced in
Compromise – This is being able to assign roles and be able to resign to someones else experience in specific parts of the project
Communication – this includes listening and being open to other peoples ideas, as well as being able to suggest your own
Project Brief: Environment
Theme: Explore the concept of “Environment” through Games, Animation, or VFX. This could mean natural landscapes, urban spaces, futuristic worlds, or even abstract interpretations of what “environment” means to you.
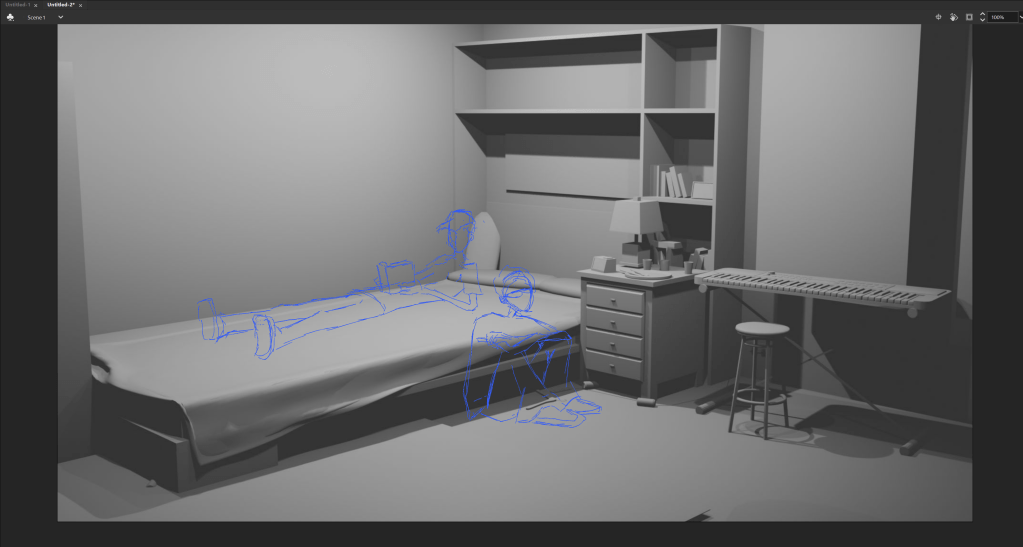
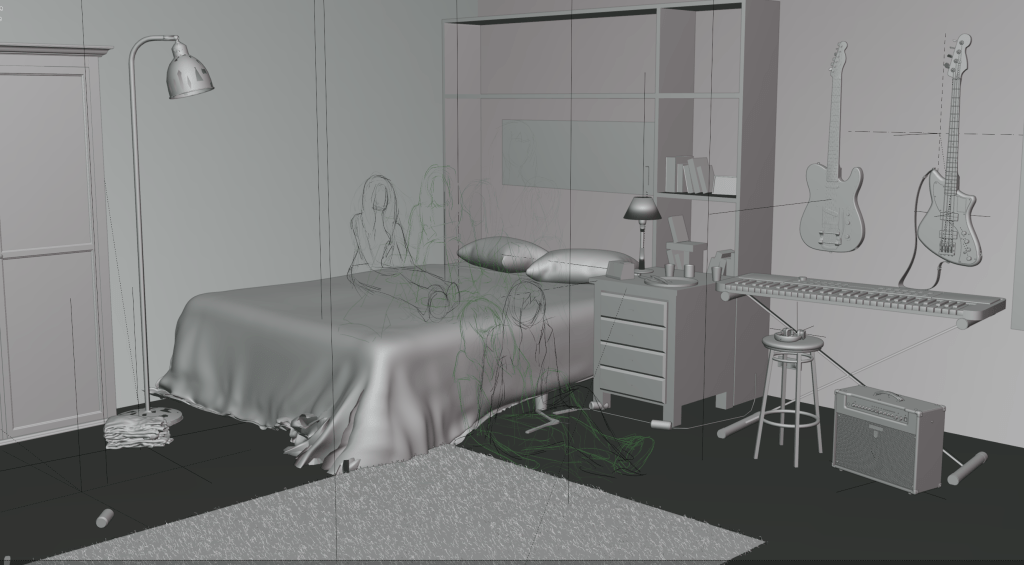
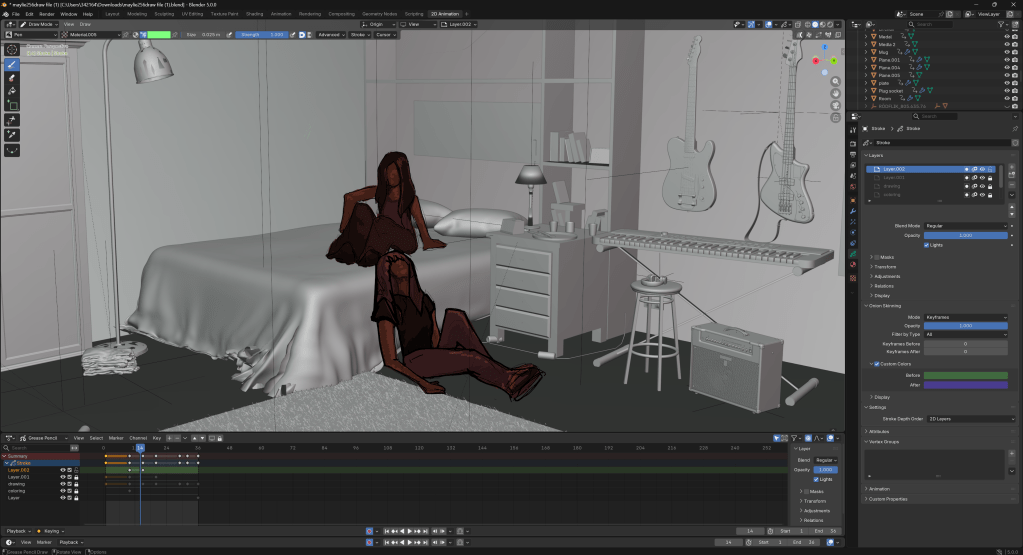
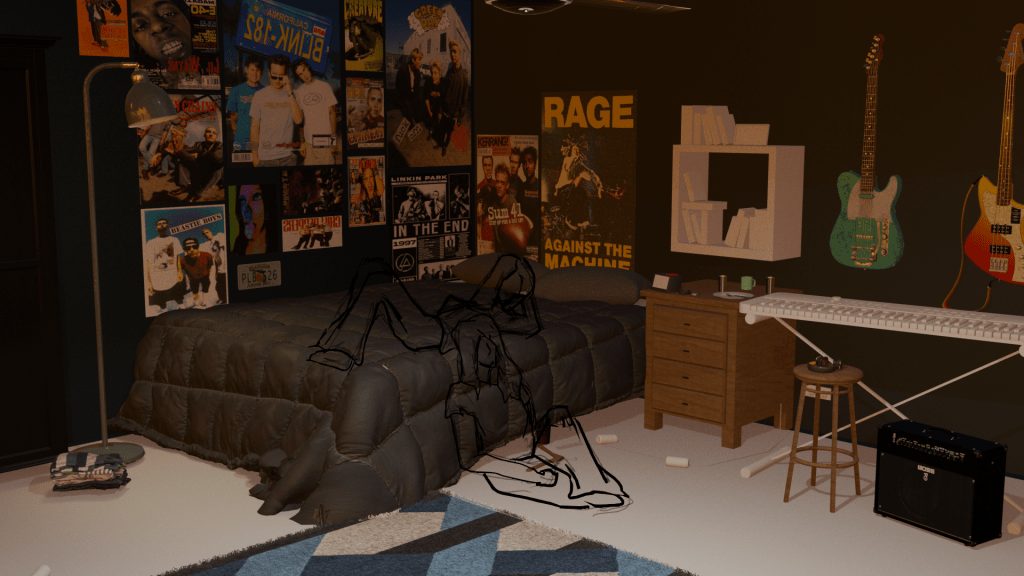
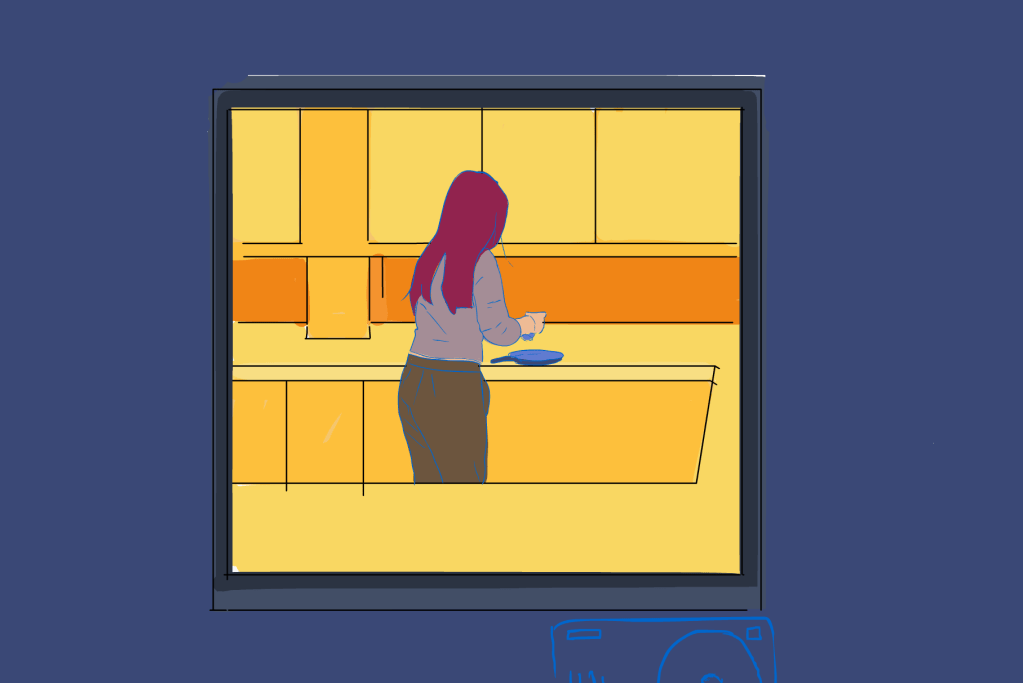
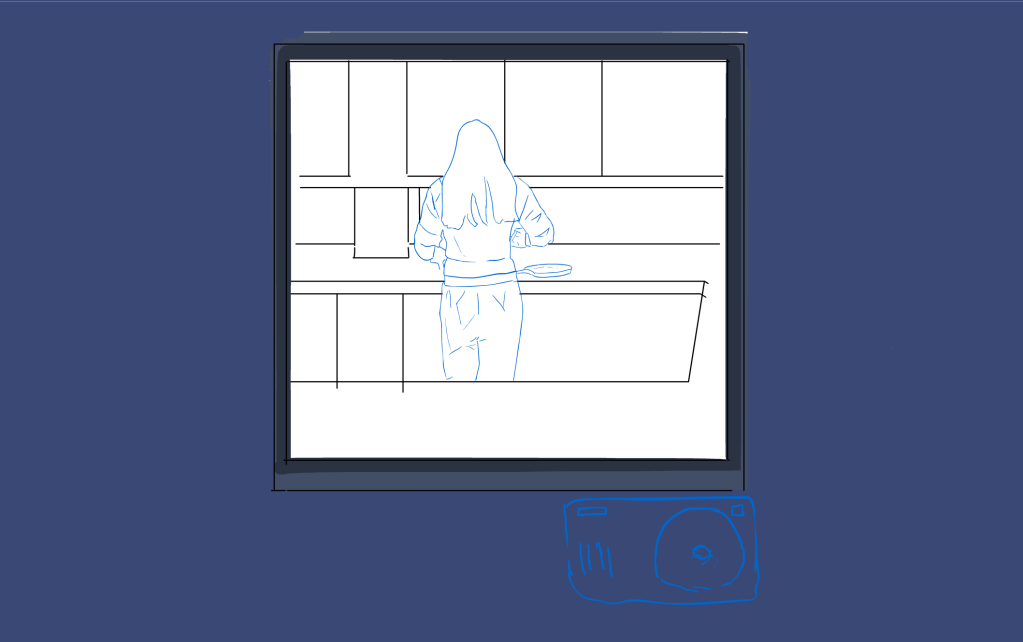
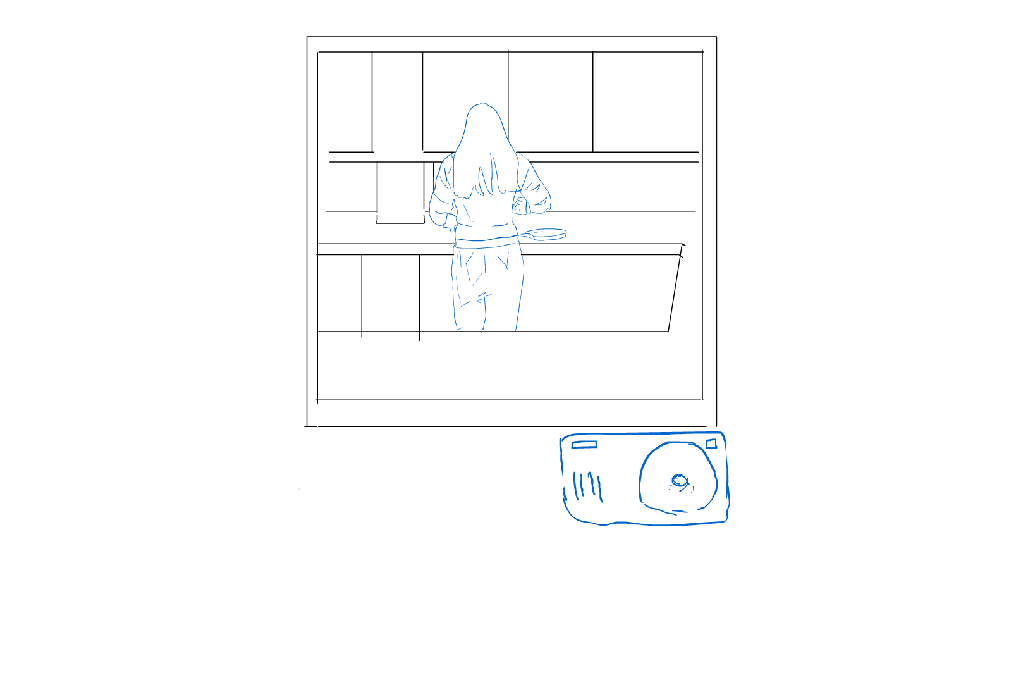
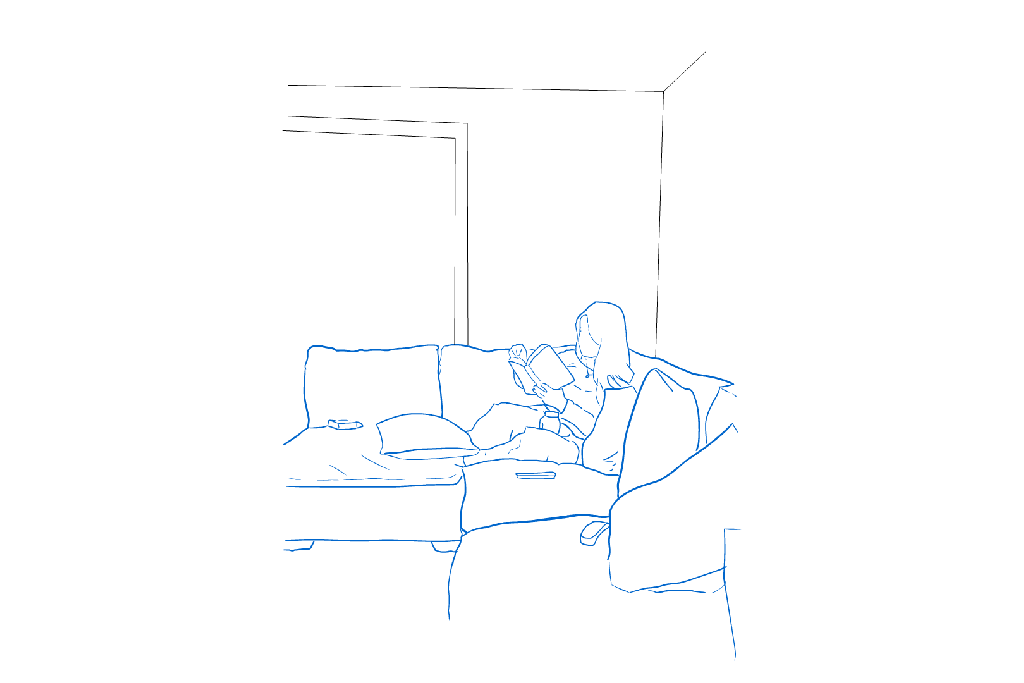
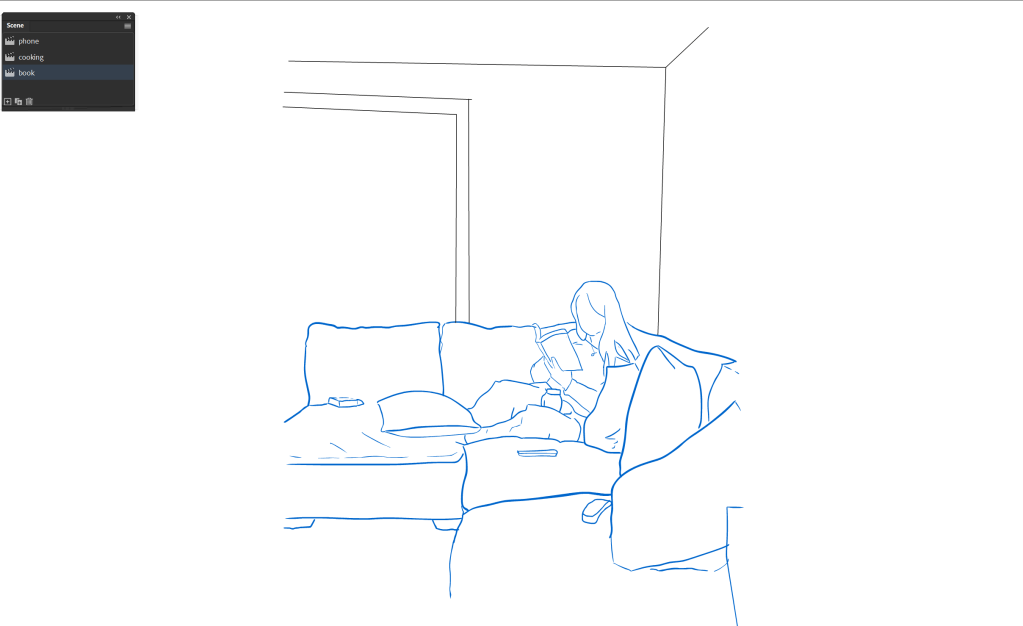
The goal for this project is the reflect the environment and dynamic between people after a party, the final render will show a teenagers bedroom cluttered with music posters and mess, with 2D characters drawn over the top.
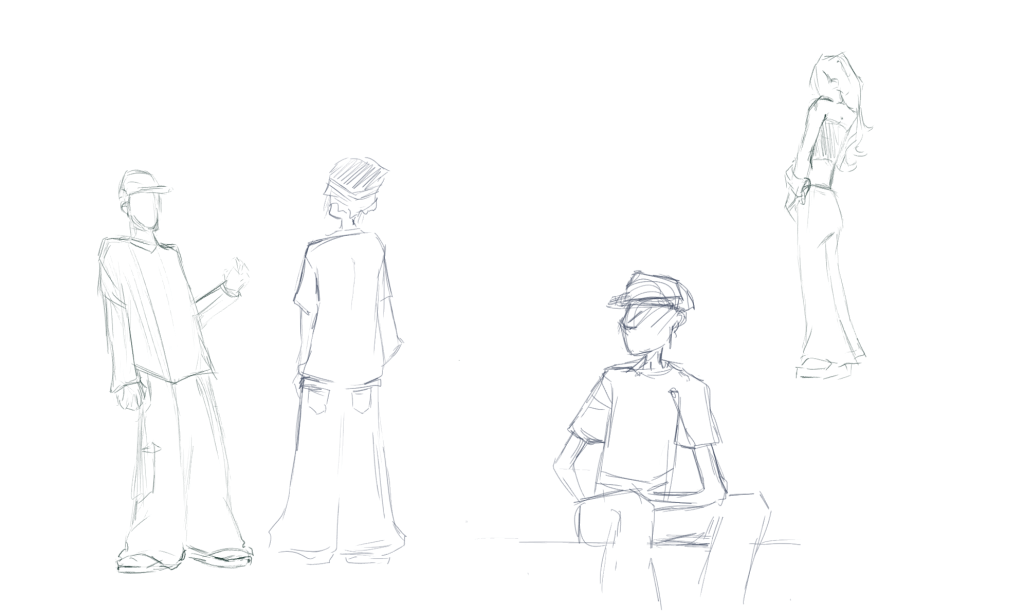
These are a couple of sketches from when I was figuring out the style I wanted to use for the characters. I didn’t want the proportions to be too realistic, similar to when cartoon characters proportions are supposed to be dramatic. I also want the characters to stand out against the 3D background, I think if I tried to draw them realistically it would not only take a very long time but the animation would lack contrast.
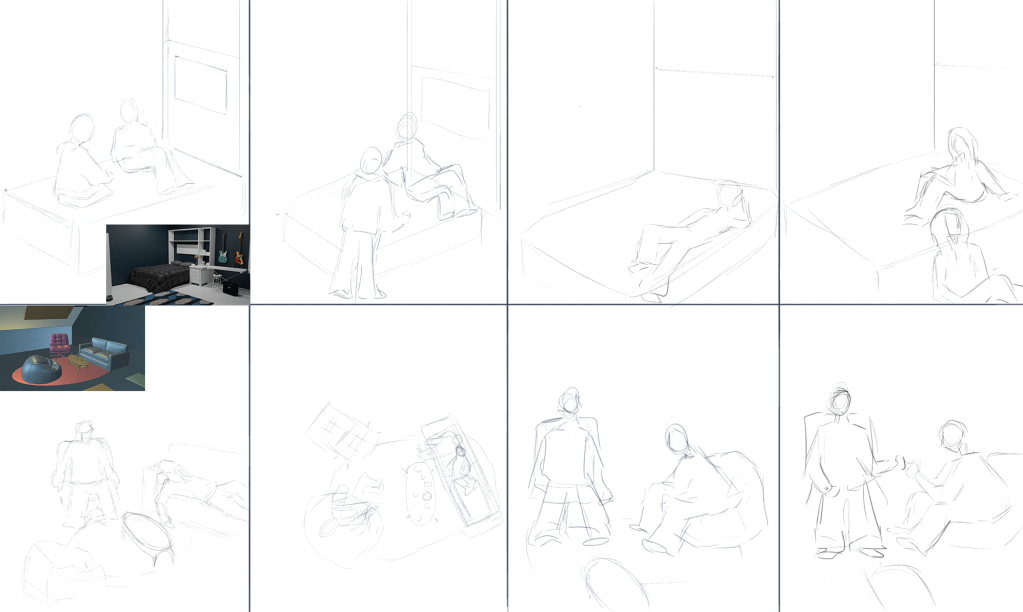
These are storyboards for what I plan the characters to be doing, I did these to mainly give me ideas on what to draw since we don’t have a linear story to follow, the main idea we are trying to highlight is the environment created in contrast to chaotic night. So I just needed to plan some of the movements, I also took into account the positioning of the furniture so I used Harry’s block out as a guid.
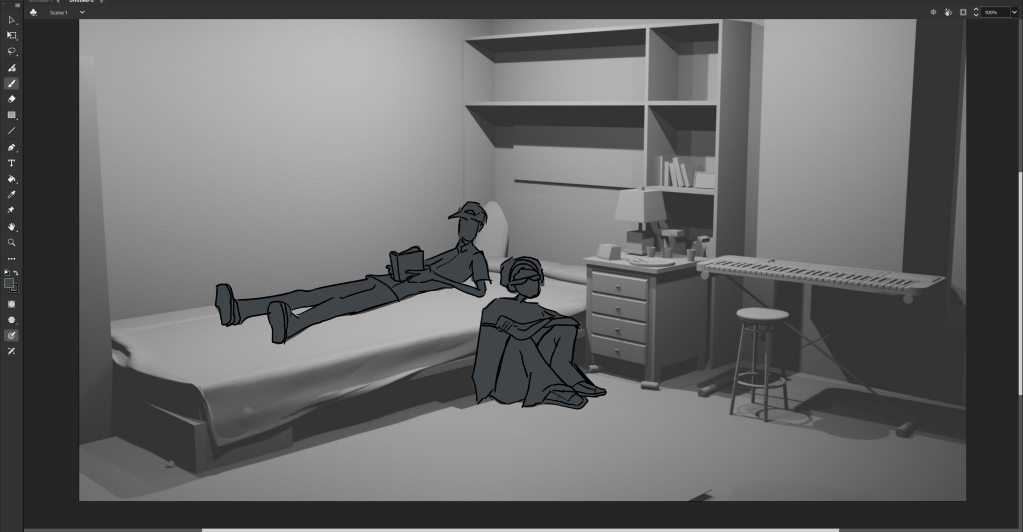
This is the result of using animate to draw a couple of the frames and while drawing I didn’t run into any problems as I used the same process and techniques I’ve used to animate in the past, and its a familiar software to me. However since I have to account for the 3D aspects this project it is different compared to any others I have done.
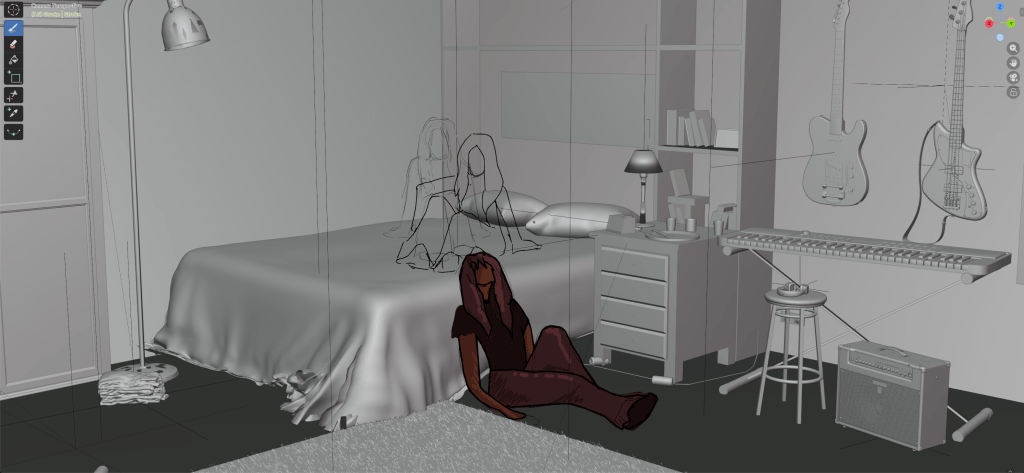
I found that animating over the top of the 3D render in a 2D space like adobe animate would make the perspective difficult to work with, and it also wouldn’t look very cohesive. so as a change of plan I decided to learn the basics of grease pencil in blender. This would be difficult since I am not familiar with the software, however for the project it would improve the look of the final product and it would make it easier to work as a group since we are using the same software.
I’m able to draw the characters directly onto the scene, this has alleviated the stress of the perspective being off since I don’t need to worry about the scene underneath just being a screenshot. So if there where any issues we could fix the easier and also means we can just amend the drawings into the finished render of the room.
This video was very useful for learning just how the basics of grease pencil worked and i found it very helpful since it highlighted which parts I can treat like any other animation software (which parts are similar to adobe) and which are specific to blender. some things i found difficult to get my head around where having to lock layers you aren’t using, because this would mean it would erase the layers underneath. I also had trouble with the brushes, i found that they where quite limiting , and with further research I could probably find brushed i can download, but with this being my first project with grease pencil i wanted to get familiar with using it first.
I found a lot of the shortcuts where similar to software I’ve used before but the keyframes and layers will take a lot more practice to get used to.
I also found the onion skin more confusing compared to animate, it ended up auto looping the animation which made it quite difficult to work on the starting frames of the animation, however once I had a few frames down this wasn’t a problem.
This is the range of brushes I had, I ended up using the pencil soft for the sketches and the marker and pen for the lines and colouring. This is something I would change once I was more experienced in the software, because I found it didn’t give you choices on how your animation would look, as you cant choose between different textures.
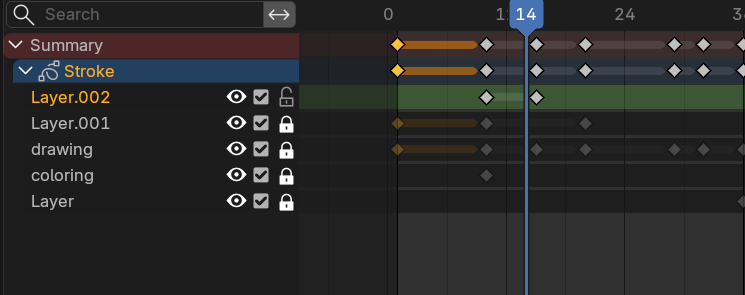
These are the layers of my animation. There are a few that are default that blender puts there for you, but I didn’t end up using these. The keyframes are something I had trouble with figuring out in the beginning and had to watch the video a few times over, but i got the hang of it eventually.
Another thing that helped me was using video references, this is something I’ve used before for an animation project and I find it helps so much more then photos, the process is similar to rotoscoping however without tracing the frames, you can just see how each movement looks slowed down and it makes it so much less overwhelming a confusing to animate people.
A goal for this project was to feel more comfortable animating in a 3d space and diversify the software I am able to use, I feel like I have achieved this goal, before this project I didn’t even know what grease pencil was, but now I am able to navigate it in a way that i can produce drawings. I also wanted to experiment with colouring is the most simple way i could while still being able to portray shadows and highlights, I have found in the past that the colouring is the most time consuming part of the project and I really wanted to cut down on it this time.
I am disappointed I wasn’t able to finish the animation, however I made this goal when I was still intending on drawing on adobe animate, so I was much more ambitious since I am more confident with the software. I am glad I got the opportunity to learn grease pencil though, and I think this is a positive outcome of this project, I am interested in continuing learning as well, and being able to use it more comfortably.
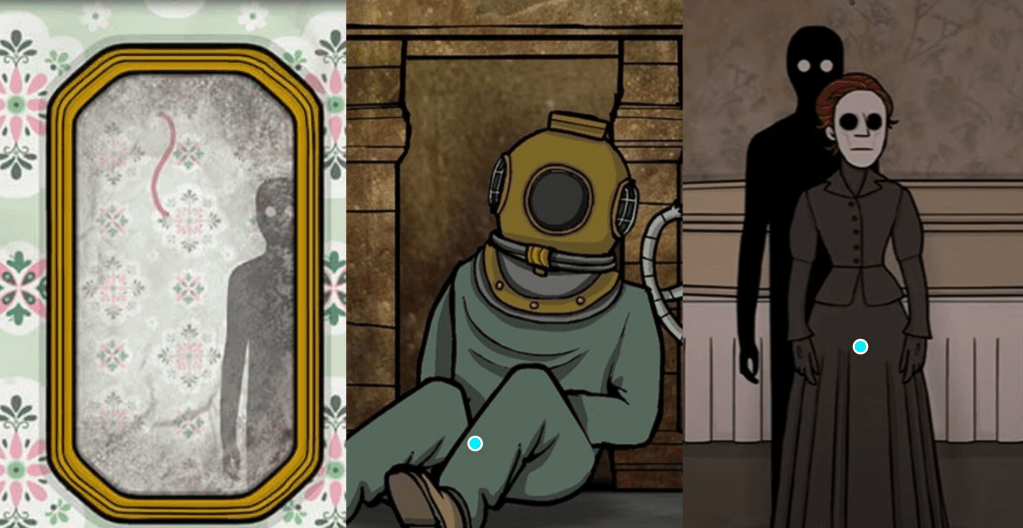
The rusty lake games are a collection of simple point and click puzzles set up like escape rooms following a detective investigating an interconnected plot explored throughout the different games, they often involve supernatural elements and are biased on horror, however are expecting the player to recognise the deeper meaning exploring themes of murder and resurrections. The series appeals to people excited about the extensive backstory and interested in the storyline, this is uncommon since its a mobile game and what I think makes it different. The storyline is also difficult to follow as there is limited speech. However, I think this could make the game more accessible to a wider audience since there would be no language barriers.
MISE-EN-SCENE
The colour pallet used in the rusty lake game series reflects the atmosphere of the game, using dark greys and reds, then also utilising shadows in certain characters to further the mystery throughout the plot. It utilises a hand drawn style, and I think the game really benefits from this since the content is never too graphic, I think the game would appeal to a much smaller niche audience if the art style emphasised the gore and supernatural elements of the game.
SOUND
The sound effects in the games are limited since there is no dialogue, however the sound effects are very important for the mood of the game since they can catch you off guard and be confusing an sometimes hard to listen to . for example in cube escape when you collect the pieces of the picture towards the end of the level the sound effects become more intrusive, making the game scarier.
CHARACTERS
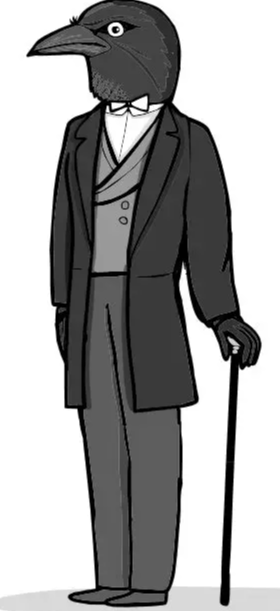
There are a lot of characters represented in the rusty lake games as intelligent or mysterious and this is chosen to be show with them having faces like animals such as crows or owls.
There is also a heavy focus on mental health throughout the game, such as the main character slowly dissenting into madness. Laura also is the main character in linking the game makers beliefs on environmentalism and mental health as she seeks the lake to sooth her depression, the power of nature being so regenerative that she is finally able to make peace with her trauma.
REPRESENTATION
The games are not constructed in order, so you can play which ever one you like , or just the free ones. each game also doesn’t stick to one timeline so the storyline in each game can run along side each other
NARRATIVE
In summary, the rusty lake games are an interconnected series of puzzle games following themes of the supernatural, reincarnation, memory and the human corruption of nature.
comparison between planned production and final project
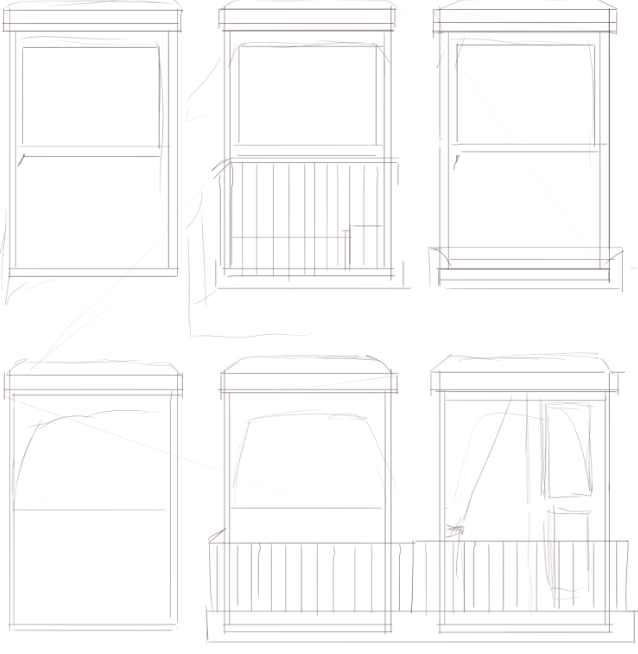
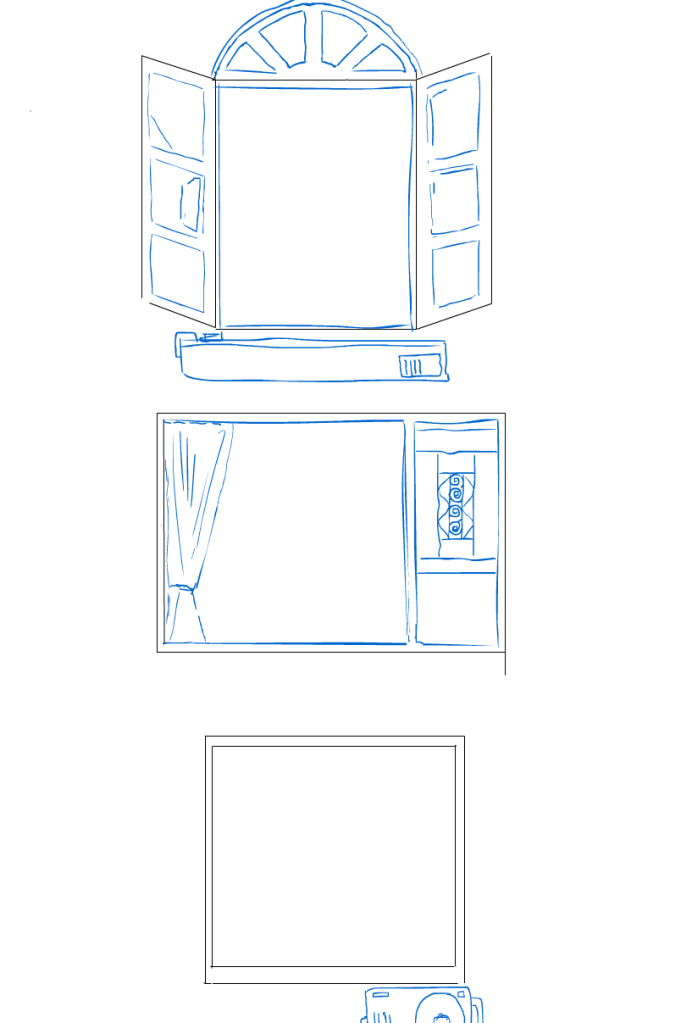
This is the difference between the idea I had for the window frame, it is obvious that my sketch changed, and I think this is because as my idea developed I found it would be more difficult to show what was going on in each window clearly if I had to move the camera from side to side. This is why I decided to only move the view up the building. I think my idea changed also, because I hadn’t drawn the scenes yet when I did the first sketch so I didn’t understand how long they where actually going to take. Because of this I wanted the individual scenes to hold most of the attention of the animation.
Project overview/ start to finish
Idea generation – At the beginning of my project I found it was easy to choose the idea I would go with because it was definitely the one I am most interested in and I found it was broad enough to aid my lack of experience in animation, by allowing me to animate seemingly simple activities. Although it was easier to convert the idea of existentialism in animation it was a bit more of a stretch linking innovation to it. I focused more on the personal projects involved within the philosophy, however there is a big emphasis on free will especially in the books i have read on it. I tried to demonstrate this idea by making the activities different and also solitary, I found that these conditions makes it the most accurate for these choices to be spontaneous, therefore producing personal innovation.
planning– my project is based in day-to-day activities so i thought it would be important to gather the reference pictures and videos myself, also since I would be using them a lot in the production process. This also helped me with research, because I was able to ask people in my sisters flat what they would actually get up to, which i think made my project more accurate at staying with the theme if existentialism. I was also able to decide how the references looked, and I wouldn’t be able to do this as effectively with photos and videos from the internet.
production – Throughout the production of my project I learnt a lot more about animation and especially the process towards the end of it, such as fixing frames in-between so the movement ran smoothly, and joining all the scenes together. This was the part of the process I struggled on the most and I think that’s because I have only made short animations and didn’t need to worry about different things happening. So adding a camera to pan up my drawings was difficult, this is also the first time i have drawn outside the stage and using the camera tool. Even though the process was difficult I am happy with how the final animation looks and I like how each movement is clear and in the center when they play.
I definitely planned for my animation to be coloured and completed when I started this project and I am disappointed I was unable to complete it entirely. I think the final animation would look a lot more put together if I was able to finish the colouring. I also like the sample I did in week 8, I like how the colours complement each other and I think this would be a good edition to my project overall. Looking back to my project schedule I have noticed I didn’t leave a time frame to get the colouring done and I just added that workload onto the drawing section and I believe that is why that part of my project struggled. I think if I where to plan and produce this project again I would set a timeframe for the colouring and also it would need to be longer then the amount of time for the drawing. I also found that even though my project is partially incomplete I didn’t feel the need to rely on my contingency plan of creating concept art instead of an animation. This is because I still wanted to push myself to create an animation since I hadn’t made one before.
Limitations-Since I relied on a lot of the work I was doing at home I had a lot of different files for the same animations, because I was switching between my laptop and different PCs, making it more confusing to edit. This is a problem I didn’t think of in the beginning, however staying organized with my files was surprisingly more important than I thought. Towards the second half of the project (after easter break) I began to use folders and naming my files appropriately which really helped.
Timeframe– Even though i didn’t set an appropriate timeframe to get the colouring done, I liked the organization I had with having specific tasks completed by the end of each week, I found this helped me stay on track and avoid burnout. I also found it helpful to remake my project schedule in week 3, this was definitely a more realistic way of using the time allocated.
In conclusion I think I have learnt a lot from the full process of making this project and I have enjoyed stepping out of my comfort zone to produce a full animation, I have been able to develop my skill in adobe animate and create an animation with a lot more frames then the ones I did through out the units of the course. These skills also extending to editing and refining the animation to the full playthrough. If I where to create this project again with the knowledge I’ve gained I would set more appropriate timeframes to be able to finish the colouring. I would also not make the movements with line art, I would block out the figure first, this is because I found it difficult to layer a background behind the figure, and ended up having to erase the background when the figure was Infront.
peer feedback– Its a very unique idea, obviously due to it not being finished that’s a negative. However this project doesn’t need color to still look good! I really like all the people doing their own thing because its really thought provoking for the viewer.
Even though I don’t have time to colour my animation completely ive done a sample of what I wanted it to look like. i think colouring the animation completely would have made it look a lot more finished and put together and I like the fact that the colours complement each other.
I think it would have also helped to colour my animation since it would have been easier to make in the long run, if i started with block colours i wouldn’t have had to worry about the layers running into each other. This is the issue i had with involving parallax since the layers of my animation erase when the figure moves over the top the parallax effect would always look strange. However if I used sold layers (so not just linear) i wouldn’t have this problem.
WWW-This helps with displaying what i originally had planed for my project, in comparison to what I was able to do
EBI-If i was able to demonstrate this throughout the animation It would make it look a lot more put together.
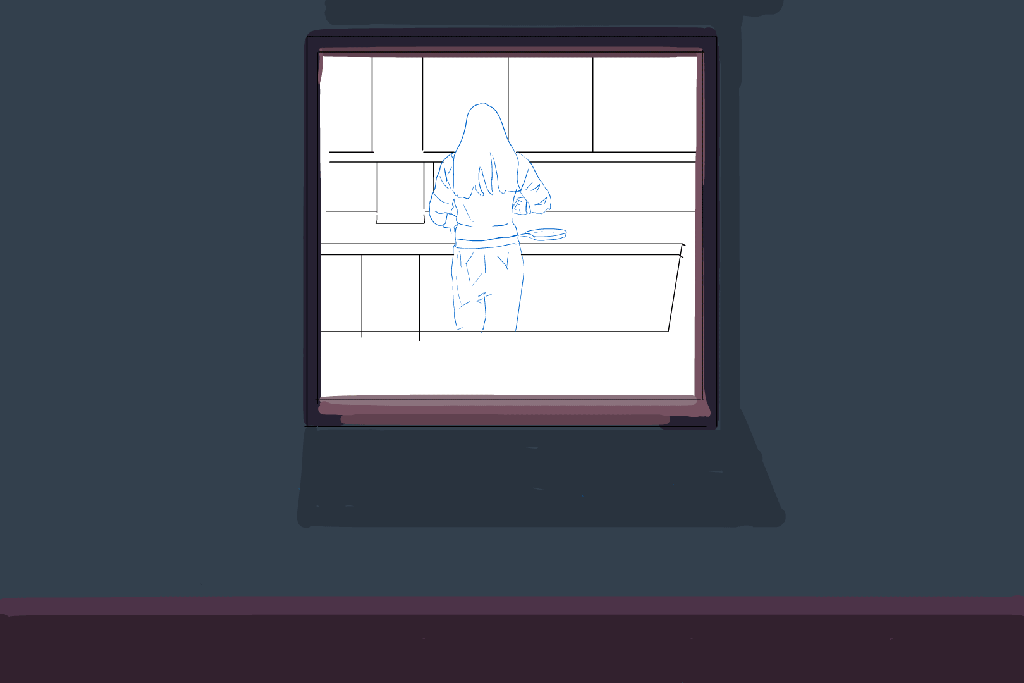
This is the window frame design I’ve drawn for the animations to take place in. It is similar to my reference images and I tried to include different styles of window, I also didn’t worry about the side windows as I chose to have the animation more zoomed in compared to what I had planned originally, this is because the animated scene took longer than expected and I wanted them to be the main focal point.
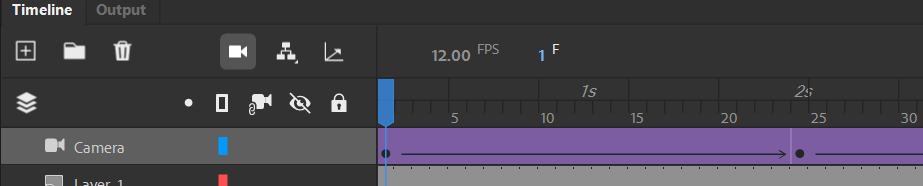
Instead of moving the animation frame by frame to be able to pan up the building I decided to use the camera tool. I have never used it before so this video was a lot of help, also because I wasn’t familiar with using classic and motion tweens, so using the camera for the first time introduced me to this. At first it was difficult to make the movement look natural, or easy to watch. I think this is because my animations are different lengths, this means that the camera would slow down for different lengths of time. however I was able to use classic tweens in-between keyframes to make it move a lot smoother.
I imported the animations one by one into the window frames so I didn’t get confused. This is because I used the edit multiple frames tool (second to the left) so as I was rescaling the animations my computer became really laggy, so I don’t think rescaling all the animations at the same time would have worked efficiently.
I am disappointed I wasn’t able to include parallax, this is when the drawings are at different distances from the camera making the movement look a lot more realistic, when I followed the steps on the video my layers ended up moving at different times so the widows didn’t line up with the backgrounds in the windows. I’m sure this is because they are line art so the layers aren’t opaque, so there isn’t drawings on top of one another. For example, the kitchen counter being erased each frame so the drawings don’t interfere with each other.
WWW-I’m glad I have figured out the editing, especially since I left last week unsure, and it is a very key part of my project. I’m also happy i didn’t end up using premiere pro because I’m not sure i would be able to make the animation move smoothy.
EBI-i think parallax would have improved my work and i am disappointed I am unable to use it with how my animation is constructed.
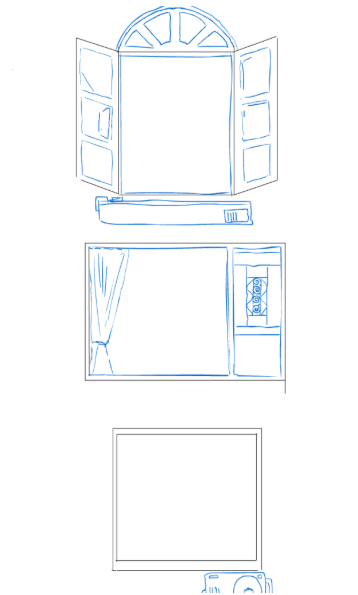
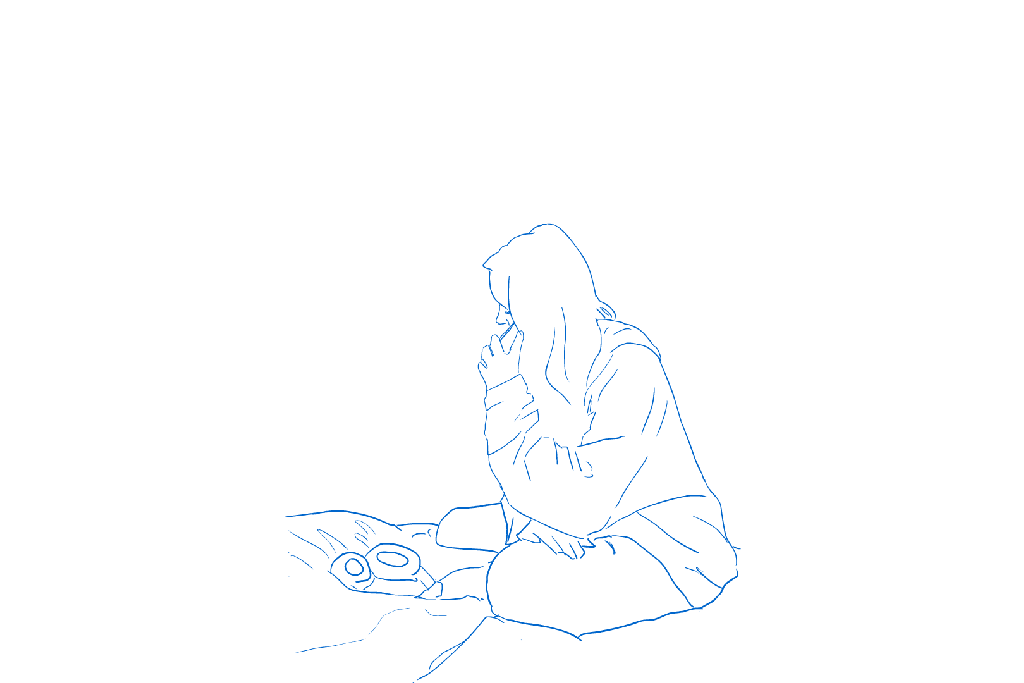
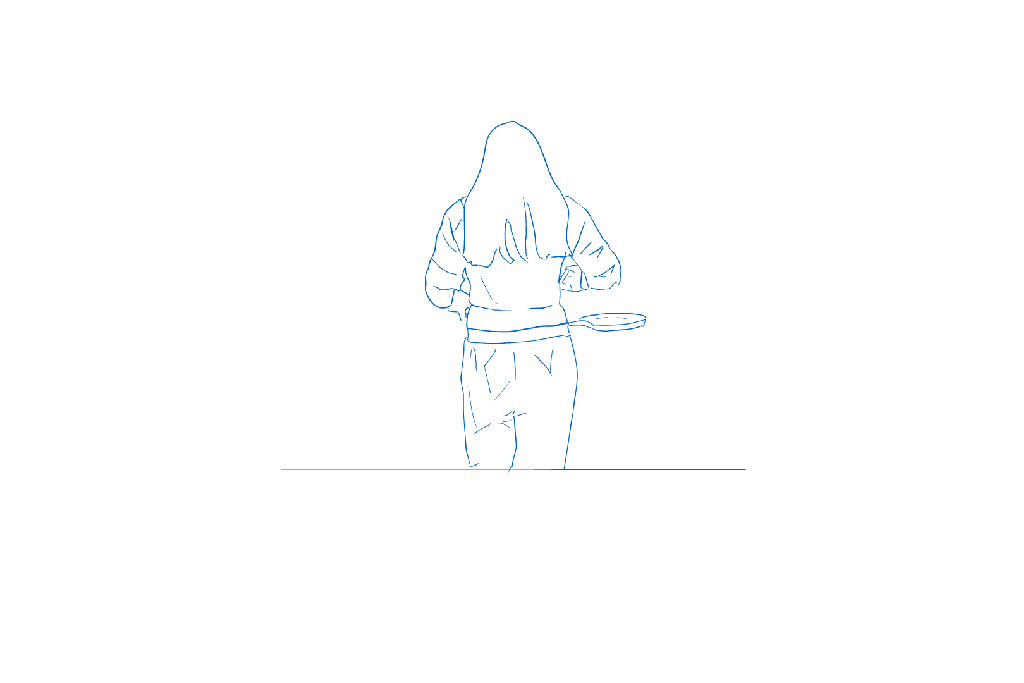
These are the completed sketches for my animation, before I begin colouring I am going to look at some videos to figure out how I will do the windows sequence where they are going up the building, I have already found that I can import the different sketches (scenes) into one animate file and edit them, however I haven’t figured out how to make them into windows.
Making sure the scenes are put together is more important to me then animation being coloured, as this will be the most time consuming part of the project. Meaning I may not get to that part in time.
I’ve watched a video on separating my animations into scenes, I think this may be helpful because each one will be shown one at a time, so I’m guessing it would make sense if they are separated to make it less confusing to edit. I am still doing further research but if it becomes to difficult to join the animations together in adobe animate I will use premiere pro instead as a backup plan, since I already know how to use this soft wear.
WWW-I’m glad I am done with the drawings and I’m able to move on to the editing next week, I like how the drawing turned out and that they have different backgrounds to go along with them
EBI-I would’ve liked to have figured out exactly how I will edit the animation, since I am still not sure how it will go, however I’m sure it will make more sense in practice. It is also helpful that I have a backup plan.