colour theory

There are different colour harmonies such as primary, complementary and analogous. these can affect how the colours are perceived in comparison to each other. for example complementary colours with be opposite from one another such as red and green, so the saturation of them will be more noticeable. however combinations following an analogous colour combination will have less range in hue and be three colours next to each other on the colour wheel, such as green yellow and orange.

There are two sets of primary colours red yellow blue and yellow magenta and cyan. using RGB is an additive way of mixing colour, it is used with light so starting with black and adding colours to eventually get white. CMY colours are more commonly used in art since it is a subtractive mixing model, you are able to achieve majority of colours from this limited palette.

I used an overlay to change the colour of my work. I tried every colour and found purple looked the best and complemented the colour underneath the nicest. However I think a lot of the values where lost since the green and purple mixing with each other made the whole image darker. Even though purple and green arn’t exactly complementary they are far enough on the colour wheel to somewhat cancel each other out. this is why this combination is different from a lot of the others since they made the image brighter, leading to loss in values.

Texturing

material preview– This allows you to see what you object looks like textured (far right icon).

solid mode – This is what you do the majority of your modelling on.(selected icon).

Increasing the metallic value makes the object appear as metal would, the roughness value is similar however it can make the object more glossy or just a flat colour. The alpha value determines how transparent the object is.

The add additional materials, click new and name you material then select the faces you would like to change then press assign.

Open the menu at the bottom of the screen and change to shader editor and click new. make sure you have a image downloaded ready. Click shift a to add and search image texture, connect the colour to the base colour. press u to unwrap.

WWW– I textured my sword from last lesson

EBI-I downloaded custom textures

normal map-images that store a direction, used to express an uneven appearance even if the mesh isn’t uneven.

UV unwrapping-‘unfolding a mesh’ necessary when you want to texture an object accurately and realistically.

procedural material-textures that are mathematically generated, instead of being biased on an image.

HDRI-high dynamic range image, they cover a 360 range, meaning you can light your scene effectively. used for 3D sceneries.

once i downloaded the image I dragged it into blender and presses alt g and r and x to rotate it along the x axis and typed 90 since that was the amount I was rotating it by.

I extruded the face downwards and matched it with the reference image I used ctrl r to add loop cuts along the object and scaled them down to define the shape further.

To make the rest of the object I extruded the face and clicked s to scale it up or down, matching it to the reference image. once I did that I added a UV sphere and scaled it down then clicked g and z to move it to the top.

to add a custom texture I first downloaded the file as a 4k-PNJ and extracted the file, then pressed add in the shader editor, then I clicked shift alt and t then inserted the material files then disconnected the displacement then unwrapped the object.

To add a background I first downloaded a HDRI from polyhaven, I downloaded the HDRI in 4K and changed from object to world in the shader editor and switched my view to viewport shading , so I could see the rendered background, I then attached the colour to the background colour.

WWW- I managed to download and use custom textures

EBI-if I finished the king I was modelling

perspective

I used the image above to show the horizon line in red and the two vanishing point with guidelines in blue and green. This was difficult because I found the vanishing point where outside of the image.

With this drawing i struggled with the horizon line and if I did it again I would have it lower, where the floor is. I also didn’t get to finish this drawing so some of the detail is unevenly distributed. i found two point perspective quite difficult when planning where the lines are because it is difficult to tell from a photo where they are.

One point perspective was much easier, this may have been because i wasn’t following a reference image so the is nothing to compare my drawing to. But also because there where less lines so i didn’t get confused on the direction of the lines I’m drawing

blender demo 3

first I modelled a shield. To do this I used a reference image, I only used one object and used it as an opportunity to practice. To create the different levels on the shields face I used the loop cut tool and extruded the faces and bevelled the edges.

The sword was a lot more complicated and I struggled a lot more with this one, this is obvious since I wasn’t able to finish the project. I had to use multiple objects for this and also attempt to add detail. I think this model would improve if I had a more detailed reference image. I was also confused since the faces kept overlapping because I had to use the mirror modifier.

blender demo -2

vertex-another word for a corner, where two or more edges meet (blue)

edge- the side of a shape , where two faces meet (green)

face-a flat or curved surface on a 3d shape (red)

texture-the appearance or feel of a surface.

render-turning a 3d scene into a 2d piece of artwork

wireframe display- this shows your 3d model as transparent, showing all the faces present

solid display-this shows the full model and is usually what the project is made in

material preview-this will show the material of the model

rendered display- you can see what it looks like rendered, so you can preview shading and lighting.

WWW- i used the different displays to create this project, making it a lot easier compared to last time

EBI-i finished my work

dust 3D

This is my first time properly using dust 3D, since i wasn’t completely comfortable with the software yet i chose to model something simple. Dust 3D is similar to sites like blender, however I found this easier to use as there is only really one way of modeling something, it is very straight forward once you learn the basic controls, making it quick to learn and get used to the process of 3D modeling.

This software is not industry standard, even though it is a cross platform software that can create low poly models, it is missing vital features that professionals are looking for. The tools on dust 3D are not very specialized and are limited compared to opposing software. There is also not a large community around dust 3D preventing suggestions on how to improve and add to the current performance. However since dust 3D is simple it is perfect for a project like mine.

however if i where to create this model on blender i would be able to add a lot more detail and texture.

blender demo

when an object is selected it will be highlighted orange, objects can move freely or along the x, y and z axis by clicking g then x y or z, to delete objects select them then press x.

the hand icon in the top right allows you to look around

g then r allows you to rotate the object

the selected icon allows you to rotate the object also

extrude- extrude freely along an axis

inset

bevel

www- i saved my work

ebi-

unit 1-4 games =Stardew valley, terraria

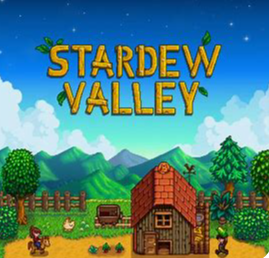
Stardew valley = gameplay and objectives-

Stardew valley is an expansive game, focusing on farming, mining, fishing and occasionally combat. However how invested the player gets in the game is completely optional, there is not much of a tutorial- besides the opening storyline explaining that you have inherited a rundown farm and it is your job to restore it. But this does not require the player to take part in the majority of the gameplay, since the game is so big .However Stardew valley has a time limit that is vital to the storyline if you decide to play along to it.

Stardew valley is a unique game according to the production, since it was developed by one person. Meaning music, game development, artwork dialogue and programming was all made by Eric Barone. This makes all aspects of this game a lot more impressive.

Eric Barone

Eric Barone was not already a game developer when he first started making Stardew valley, he had actually just graduated with a computer science degree-which can be useful when developing a game however, this means a lot of his skills where through trial and error or being self taught.

Eric’s inspiration for Stardew valley comes from the farming game harvest moon, however he also played kings quest and hero’s quest. Comparing harvest moon to Stardew valley, you can see that the games are very alike, according to the gameplay and even graphics, however his main goal is to add new and interesting features to Stardew valley, making it an original feature to the genre. Eventually extending it from a farming game entirely .

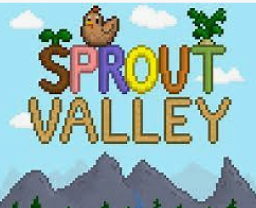
Stardew valley actually originated as being a harvest moon clone called sprout valley-as it was Erics first game. He wanted to get familiar with developing and he liked how you could have relationships with the npc’s in the game and it can heavily impact your experience. This was something he noticed wasn’t in other games he played and made the game a lot more personal. However his idea with Stardew valley was to address the problems he had with harvest moon an add more depth to the gameplay since he noticed that harvest moon never seemed finished.

As the game progressed Eric saw more possibility in it, instead of being something to fill up his portfolio, he decided he would continue developing the game and differentiate it from being a simple harvest moon clone that fans of the game would enjoy. This decision was the beginning of Erics career as an indie game developer.

creation of the game

Since Eric had a base to work off, the game was able to develop and evolve slowly, he began making the main area that the players farm would be and the basic farming mechanics. It is also important that before he added minerals and fish he would research the area that would make that most sense for that to reside. In September 2012 Eric released the game on steam greenlight to see if there would be any interest in the games concept, this was also when he created his website so players could keep up to date with the games development. In February 2013 Chucklefish announced they would be publishing Stardew valley. This was the perfect time also, since it was common for indie games to be published on steam early access, however Eric didn’t want this to be the case for Stardew valley because he wanted it to stand out and knew people where getting sick of paying for unfinished games. In may 2013 Stardew valley was greenlit so now he had a publisher and steams approval to create the game.

Since the game took 3 years after being greenlit to publish Eric used this time to keep players updated on his blog and this also keep interest in the game through people giving feedback. So even though Eric produced this game independently he was able to have a diverse range of opinions from people who most importantly where going to be playing the game.

terraria -comparison

Terraria as a game is very similar to Stardew valley according to visuals and gameplay, for example both games are 2D. However the games can be very different. focussing on terraria, this game is a lot more replayable compared to Stardew valley and no two play throughs will be the same. this can make the game more appealing as you can really get your moneys worth when you buy a game you can play over and over. this is especially attractive to beginner gamers as there is not much investment as it is relatively cheap game, and you can cooperate on worlds making the game more fun and less overwhelming.

However, in comparison to Stardew valley terraria does not have a structure for the player to follow. For example Stardew valley has an opening sequence that is played at the start of any new game, this can help the player understand the motives of the game and not be confused on where to start. This type of introduction is absent in terraria forcing the player to have a slower start, or alternatively have to read through guides to continue playing smoothly, which can compromise the immersive nature of the game.

ecosystems

vibrant -colour-rainbow-rain-weather-seasons-winter-christmas-birthday-balloons-hot air balloon-sky-space-planets-stars-bright -fairy lights-Christmas tree-glass-jars-iced coffee-money-paper-trees -forest-ecosystems-biomes-minecraft-mooshroom cow -normal cow -grass-

ecosystem-

biome-cold, winter so creature have natural defenses to help with the cold-fur, small ears

plants- shade tolerant, so they can grow in the dark due to the cold climate – blue white

herbivore-short legs, fur, small ears-small population, bottom of the food chain 😦 poison skin defenses

predator-big ,spikes-ice, scary, good hunters ,long legs- quick

Screenshot
Screenshot
Screenshot
Screenshot
Screenshot

I used my reference images to create a predator in the ecosystem, I also used this as an opportunity to experiment with different brushes in photoshop .I think my work could be improved by being a little more realistic as i didn’t really refine the sketch and add detail, which if I had more time I would have done. I also would have liked to create a herbivore and plants to elaborate on the type of environment my ecosystem is.

blender project

This artist has taken clear inspiration from a games controller to create this design. I find this interesting since it still completely resembles the reference however they have change certain aspects to emphasize that fact its supposed to be a ship. This is a common process for this artist and not unusual to take inspiration from household objects, I assume this allows them not to get to wrapped up in the structure of the ship and can focus on the mechanics and finer details instead.

I also find the art style interesting, it is very different from a lot of the other art on artstation since it is more of a cartoon style instead of hyper realistic.

This artist is obviously very different to spacegooose due to there hyper realistic style, it is also common for this Egor Poskriakov to create a scene instead of one singular design- that is clear in this piece. The artist has thought about how there design will interact with the world they created whether this is a game or a film, this isn’t something that is common in spacegooose’s work.

i aim to make my first project on blender successfully.

This is my inspiration for my project, i used Pureref to create a mood board of picture that i like the style of. The majority of the pictures are from artstation from artists that created them for games, however a few are from google since i wanted to search for more specific ideas-such as the fish submarines, this is a more specific idea that i aim to follow.

The colour scheme is going to be blue and green since my ship will be underwater, and i aim to base the structure on a manta ray.

www- i found an idea for my project

ebi-i found more variety of images

Design a site like this with WordPress.com
Get started